

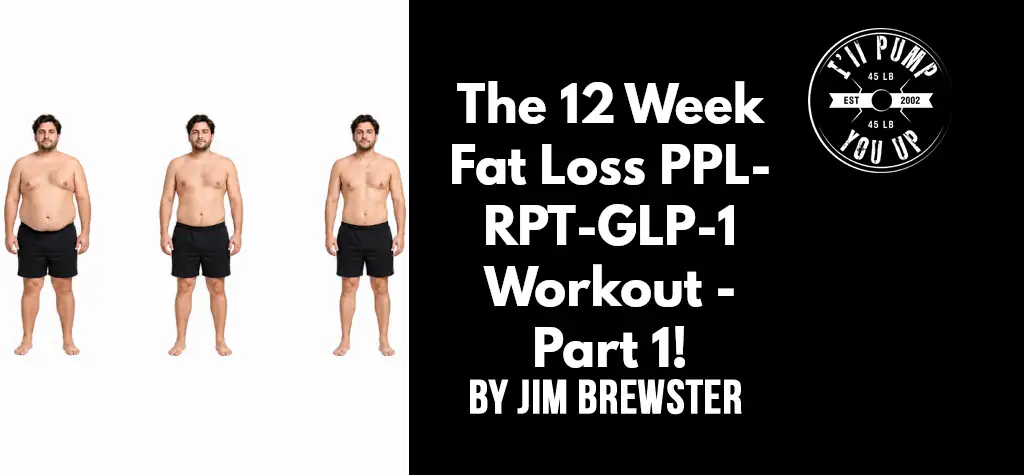
The 12 Week Fat Loss PPL-RPT-GLP-1 Workout – Part 1!
The focus is on Fat Loss – as in the 12 Week Fat Loss PPL-RPT-GLP-1 Workout! It may be late summer, but people are jumping on a fat loss program (and the GLP-1 drugs) all the time. That’s true whether it’s losing those last few pounds, dropping a little bit more, or the beginning of a major fat loss push.
In this 3-Part Series, I will show you how to achieve your goal while also preserving as much muscle mass as possible. I will also cover the training and protein needs for GLP-1 dieters – after all, 1 in 10 people are using a GLP-1. So let’s get right to it – check out Part 1, then jump into Part 2 and then Part 3!
At A Glance
| Fat Loss Program & Cardio Fundamentals | ||
| Program Components | Highlights | Takeaways |
| Primary Objective | Fat Loss + Muscle Retention | Heavy RPT tells the body to burn fattissue, not muscle tissue. |
| Weekly Lifting Schedule | 3 Training Days / 4 Rest Days | Train on non-consecutive days (e.g., M/W/F).Rest days help lower chronic cortisol. |
| Workout Split | Push / Pull / Legs (PPL) | Maximum muscle recovery between sessionswhile in a caloric deficit. |
| Set Strategy | Reverse Pyramid Training (RPT) | High-load intensity first set recruits maximummuscle fibers to protect mass. |
| Progression Model | Retention Double Progression | Fight to maintain your baseline strength weightsover the 12 weeks. |
| Cardio Frequency | 3 to 5 Days Per Week | Scaled entirely by how much fat the reader has to lose (Level 1, 2, or 3). |
| Cardio Duration | 30 to 45 Minutes Per Session | Performed after lifting weights or on rest daysusing low-impact modalities. |
| Periodization | Non-Linear Phase Cycling | Weeks 1–4: Strength RetentionWeeks 6–9: Density (Elevated Heart Rate)Weeks 11–12: Maximum Tension Control |
| Burnout Prevention | Strategic Metabolic Deloads | Weeks 5 & 10: Prevents fat-loss plateausand protects joint integrity. |
The 12-Week Blueprint
When you’re cutting calories, your recovery capacity drops. To prevent the body from burning muscle for fuel, your load intensity must stay high, but your training volume must be tightly controlled. This 12 Week Workout includes two deload weeks to safeguard your metabolic rate and joint health. Instead of adding junk volume (which destroys recovery during a cut), we will manipulate density and tension to maximize the fat mobilization while forcing the body to hold onto its muscle:
- Weeks 1–4 (Strength Maintenance): Establish baseline RPT weights. Heavy loads signal to the body that muscle mass is required to handle the weight, helping to prevent catabolism.
- Weeks 5 & 10 (Metabolic Recovery Deloads): Lower volume to allow the central nervous system to recover from both heavy lifting and your caloric deficit.
- Weeks 6–9 (Glycogen Depletion & Density): Shave 30 seconds off your rest intervals. This keeps the heart rate elevated, turns up the metabolic burn, and increases growth hormone response. Remember, density targets metabolic stress, a mechanism of muscle growth.
- Weeks 11–12 (Maximum Tension Phase): Slow down the concentric and eccentric phases (3 second concentric, 6 second eccentric, pause 6 seconds in the fully stretched position on every rep of your last set). Maximizing time under tension forces muscle preservation even when glycogen stores are completely empty.
What Is Reverse Pyramid Training (RPT)?
Reverse Pyramid Training means that you go right into your heaviest set first when you’re still fresh (after warmups of course). Then on your next sets you gradually drop weight while slightly increasing reps. This is different from a standard ascending pyramid, which has you increasing weight and dropping reps until you reach 1 or 2 top sets. However, by that time you’re fatigued and you can’t handle as much weight as you could using the RPT approach. (1)
Your Starting Weights
There is a formula you can use to calculate your weight for each set, and it is based on your One-Rep Max (1RM) along with the use of the Load-Repetition Table.
The Formula You Can Is As Follows:
Weight Used per Set = 1RM x Target Load Intensity (the amount of effort or intensity used to lift a heavy weight). The heavier the weight the greater the “load intensity”.
The Load-Repetition Table
I’ve been using this Table for several articles. It estimates how many reps you can get lifting different percentages of your 1RM. It’s easy to use and we will see in the upcoming example. (2, 3)
| Target Reps | Percentage of 1RM | Primary Training Goal |
| 1 | 100% | Absolute Strength |
| 2 | 95% | Absolute Strength |
| 3 | 93% | Absolute Strength |
| 4 | 90% | Power / Strength |
| 5 | 87% | Power / Strength |
| 6 | 85% | Hypertrophy / Strength |
| 8 | 80% | Hypertrophy (Muscle Gain) |
| 10 | 75% | Hypertrophy (Muscle Gain) |
| 12 | 70% | Hypertrophy / Endurance |
Here’s a 3-Step Example
For our example, we can use a set of 200 pounds for 6 reps taken to failure. It’s a max effort, so we can calculate the exact weight you will need.
Step 1: Find your 1RM (Using the Epley Formula)
If you’re unsure what your 1 Rep Max is, you can figure it out using the Epley Formula, created by Boyd Epley in 1985. This is a common strength training formula that lets you estimate your 1RM without performing an actual max-effort lift.
1RM = Weight x (1 + reps/30).
To find your approximate 1RM, multiply the weight lifted by 1 plus the reps you achieved. Then divide that number by 30. (4)
The Simple 3-Step Process
I’m not a math guy, so I want this formula simplified, so let’s break it down into 3 easy easy-to-follow steps:
Step # 1: Divide your rep total by 30.
Step # 2: Then Add 1 to that number.
Step # 3: Finally, Multiply the final number by the weight you lifted
Example:
As noted, we’re saying you lifted 200 lbs x 6 reps to failure.
- Divide your reps by 30
- Calculation: 6 ÷ 30 = 0.20
- Add 1 to that number
- Calculation: 0.10 + 1 = 1.20
(This number is a multiplier. It means your 1-rep max is roughly 120% of the weight you used for 6 reps). - Multiply the weight lifted (200 lbs) by that 1.20 multiplier
- Calculation: 200 × 1.20 = 240
- Your estimated 1-Rep Max is 240 lbs.
Why Divide By 30?
The formula assumes a strength drop of 3.33% for every rep you do with a heavy weight. This is the number discovered by practical coaching observation primarily by Boyd Epley. Later, sports scientists verified his observations.
Step 2: Calculate the Weight Needed for Specific Sets
Ok, so you have your 1RM. Next, we need to figure out your starting weight on your first and heaviest working set. To do that, just apply the percentage from the Load-Repition Table for each rep goal as follows:
Let’s say you’re doing a 6-Rep Set (85%):
The calculation: 240 x .85 = 205 lbs (rounded up from 204)
Then reduce the weight by 10% for Set 2 and then another 10% for Set 3.
The Muscle-Preserving PPL-RPT Template
Your Core Training Rules
- The 3-Day Rule: Make sure you work out on non-consecutive days (Monday, Wednesday, Friday or Tuesday, Thursday, Saturday). This gives you 4 full recovery days. Whether you’re on a cut or bulk, more days in the gym is not better; recovery is everything, as you hear me say all the time.
- The RPT Structure: As noted, Set 1 is your heaviest (take it to failure). Set 2 is 10% lighter (you’re aiming for 2 more reps). Set 3 is another 10% lighter (you’re aiming for 2 more reps over set 2). So that’s 6 reps, 8 reps, 10 reps.
- Double Progression: On a fat-loss plan, your goal is to maintain your weight and reps. However, if you can manage to add 2.5 to 5 lbs because you hit your top reps, it’s a massive win.
The Universal Warmup
Perform this warm up sequence before starting the first exercise of every workout to get your muscles ready and prime your nervous system without burning the glycogen you will need for your heavy sets.
General Phase: 5 minutes of low-intensity cardio followed by 10 arm circles, 10 band/PVC pipe shoulder pass throughs, and 10 bodyweight squats.
How to do Shoulder Pass-Throughs
- Stand with your feet shoulder-width apart and hold a PVC pipe or light band with a very wide grip in front of your thighs.
- Tighten your stomach and squeeze your glutes so your lower back does not arch during the movement.
- Keep your arms straight and lift the pipe slowly up and over your head while keeping your elbows completely locked out.
- Continue the arc until the pipe reaches your lower back or glutes, then reverse the motion back to the front
Acclimation Sets (60-sec rest between each):
- Set 1: Empty Barbell or ultra-light weight × 10–12 reps
- Set 2: 50% of your heavy Set 1 working weight × 5 reps.
- Set 3: 75% of your heavy Set 1 working weight × 2 reps.
Day 1: Push (Chest, Shoulders, Triceps)
Perform the above warm up. Remember, perform your first set then reduce the weight by 10% each set for your remaining 2 sets. Do this for each exercise unless otherwise indicated.
Flat Barbell Bench Press
1 set x 6 reps
1 set x 6-8 reps
1 set x 8-10 reps
Incline Bench Press
1 set x 6 reps
1 set x 6-8 reps
1 set x 8-10 reps
Barbell Overhead Press
1 set x 6 reps
1 set x 6-8 reps
1 set x 8-10 reps
Dumbbell Lateral Raises
3 sets x 8-10 reps (use the same weight for each set)
Seated Crunch Machine
3 sets x 15 reps
Ab Wheel
2 sets x 15 reps side to side
Day 2: Pull (Upper Back, Lats, Rear Delts, Biceps)
Deadlifts
Same warmup as Day 1
1 set x 6 reps
1 set x 6-8 reps
1 set x 8-10 reps
Chest-Supported Seated Row Machine
1 set x 6 reps
1 set x 6-8 reps
Lat Pulldowns
Normal Overhand Grip
1 set x 6 reps
1 set x 6-8 reps
Hammer-style Grip (Biceps Focus)
1 set x 6-8 reps
1 set x 8-10 reps
Underhand Grip (Biceps Focus)
1 set x 6-8 reps
Hanging Knee Raises
4 sets x 12-15 reps
Day 3: Legs (Quads, Hamstrings, Calves)
Squat
Same warm up as Day 1
Set 1 x 6 reps
Set 2 x 6 reps
Set 3 x 6-8 reps
Seated Leg Curls
3 sets x 6-8 reps (use the same weight for each set)
Standing Calf Raises
2 sets x 15 reps
Seated Calf Raises
2 sets x 15 reps
Ab Wheel (or the Ab Coaster if your gym has one)
2 sets x 15 reps – roll straight forward
2 sets x 15 reps – roll to the right
2 sets x 15 reps – roll to the left
Performance Notes
Use a full range of motion on all your sets! I see lifters using half or quarter reps all the time – don’t do that! Rest 2-3 minutes on your heavy sets as needed, but no more! Do not be one of these people that spend 10 minutes on their phone between half-hearted sets. (6)
The Calorie Deficit Deload Weeks (Week 5 & Week 10)
During a calorie deficit, a deload week acts as a metabolic reset to prevent hormone down-regulation (like thyroid and testosterone drops). (7)
- Load Intensity Reduction – Reduce all training weights by exactly 30%.
- Volume Drop – Drop your 3rd working set completely you’re only doing 2 sets per exercise).
- Effort Drop – Stop all your working sets 3 reps short of failure.
Summary
And that’s Part 1! We covered a lot in this section, in Part 2 we will look at cardio, nutrition and supplements tips. Plus, there is a section specifically for GLP-1 dieters. And in Part 3, we have a Special Section covering 2 Key Problems. Before you head over to Part 2 and 3, stop by illpumpyouup.com and check it out!
References:
- Zinovieff, A. N. (1951). Heavy resistance exercises: The Oxford technique. British Journal of Physical Medicine, 14(6), 129–132. (Note: This is the seminal 1951 research paper establishing the physiological foundation of modern Reverse Pyramid Training)
- https://jameslnuzzo.substack.com/p/the-repetitions-1rm-relationship
- National Strength and Conditioning Association. (2021). NSCA’s guide to program design. Human Kinetics.
- https://theicss.org/2023/09/04/the-comprehensive-guide-to-1rm-calculators/
- https://www.mensfitness.com/training/5-rules-warming-truth-more-strength
- McKendry, J., Pérez-López, A., McLeod, J. C., & Phillips, S. M. (2016). Short rest intervals blunt the acute myofibrillar protein synthetic response to resistance exercise in resistance-trained men. Experimental Physiology, 101(7), 866–875. University of Birmingham.
- https://www.sciencedirect.com/topics/biochemistry-genetics-and-molecular-biology/downregulation
By Jim Brewster